Introduction
In this post we will program ESP32-Cam using Arduino Uno. But you can use Arduino Pro or Mega, or another one version of course.
We will upload the default sketch from the official espressif/arduino-esp32 github page to the ESP32-Cam.
Everything in this post is done on Ubuntu 22.04.1 LTS.
Wiring Diagram

- Red - Arduino:5V -> ESP32-Cam:5V
- Black - Arduino:GND -> ESP32-Cam:GND
- Green - Arduino:TX -> ESP32-Cam:UOT
- Yellow - Arduino:RX -> ESP32-Cam:UOR
- Purple - ESP32-Cam:GPIO0 -> ESP32-Cam:GND
This wire is used to set the ESP32-Cam to the FLASH Mode.
- Blue - Arduino:RESET -> Arduino:GND
This is used to set the Arduino as a programmer for the ESP32-Cam.
Configure Arduino IDE
I use Arduino IDE v2. But all of these instructions would work for Arduino v1 also.
- Open Arduino IDE and navigate to the File > Preferences.
- We should add the URL for the ESP32-Cam Board Manager to the Additional boards manager URLs setting.
To do this click on the button right of the input field.
 And paste this line
https://dl.espressif.com/dl/package_esp32_index.json
Tip. If you want to add more URLs behind this line in the future, just add new URL to a new line.
- Now we should install the Board Manager for the ESP32-Cam.
Navigate to the Tools > Board > Boards Manager….
In the search bar type the
esp32and click on the Install button.
Configure ESP32-Cam board in the Arduino IDE
After the previous steps (Wiring and Arduino IDE configuration) connect your Arduino Uno board to the computer.
Now we can select the ESP32-Cam board in the Arduino IDE and program it!
- Navigate to the
Tools > Board > esp32and select ESP32 Wrover Module. - Set the Upload Speed to the 115200 in the
Tools > Upload Speed. - Set the Flash Frequency to the 40MHz in the
Tools > Flash Frequency. - Set the Flash Mode to the QIO in the
Tools > Flash Mode. - Set the Partition Scheme to the Huge APP (3MB No OTA/1MB SPIFFS) in the
Tools > Partition Scheme. - Set the Port to the /dev/ttyACM0 (or
/dev/ttyS0, or similar to these) in theTools > Port.
Programming the ESP32-Cam using Arduino Uno
Now we can select the example sketch: File > Examples > ESP32 > Camera > CameraWebServer.
Modify a few lines of code to get it working.
- Change SSID - your Wi-Fi Network name. Modify the line
const char* ssid = "*********";
with the following line (just use your Wi-Fi Network name)
const char* ssid = "3D2DAY-WiFi";
- Change Wi-Fi Password - password to connect to your Wi-Fi Network. Modify the line
const char* password = "*********";
with the line contains the password for your Wi-Fi Network
const char* password = "share_this_page_with_friends";
- Replace the line
#define CAMERA_MODEL_WROVER_KIT // Has PSRAM

# with the line

//#define CAMERA_MODEL_WROVER_KIT // Has PSRAM
and replace the line
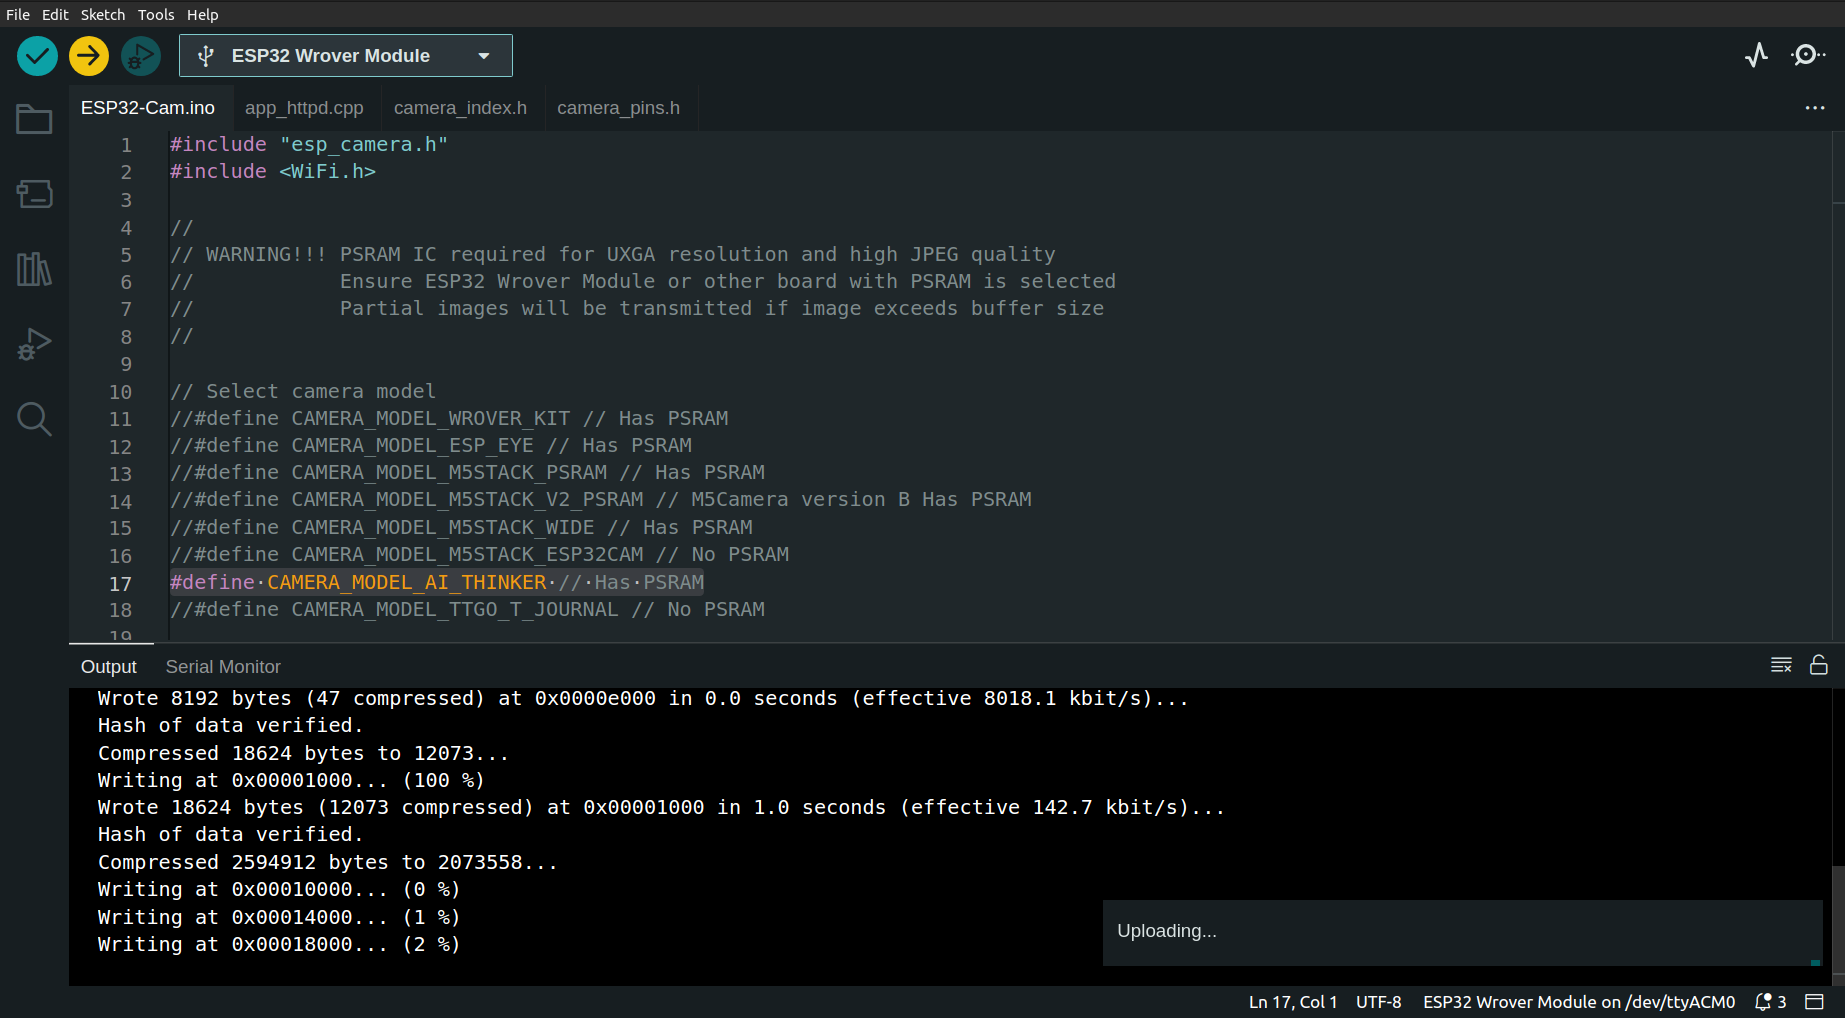
//#define CAMERA_MODEL_AI_THINKER // Has PSRAM

# with the line

#define CAMERA_MODEL_AI_THINKER // Has PSRAM
That’s it!
Click on the Upload button to upload the code to the ESP32-Cam.
If everything is OK, you will see the upload percentage in the Arduino IDE CLI.
If you have any issues uploading the sketch - please read the TroubleShooting section.
Test ESP32-Cam
After sketch will be uploaded in the Arduino IDE CLI you will see the lines
Leaving...
Hard resetting via RTS pin...
Follow the steps:
- Insert the microSD card into ESP32-Cam. The volume of the microSD card should be 4 GB or less. With larger volume also should work, but ESP32-Cam can only use 4 GB.
- Disconnect the purple wire from the ESP32-Cam.
- In the Arduino IDE open
Tools > Serial Monitor. - In the Serial Monitor window set the Baud Rate to the 115200.
- Click RST (reset) button on the back side of ESP32-Cam.
In the Serial Monitor window you should see the ESP32-Cam trying to connect to your Wi-Fi. And when it’s finished, you will see the URL.

This is the URL where the ESP32-Cam streams the video. Open it in the new tab of the browser and click on the Start Streaming button.

If you have errors in the Serial Monitor - please read the TroubleShooting section.
Troubleshooting
1. “python”: executable file not found in $PATH

You probably have Pyhton 3 installed, which calls like python3 in the Command Line Interface. But the Arduino IDE calls it as python.
This is why you got this error.
To fix this, just open Terminal (CLI App) and execute the following:
sudo apt install python-is-python3
2. ModuleNotFoundError: No module named ‘serial’
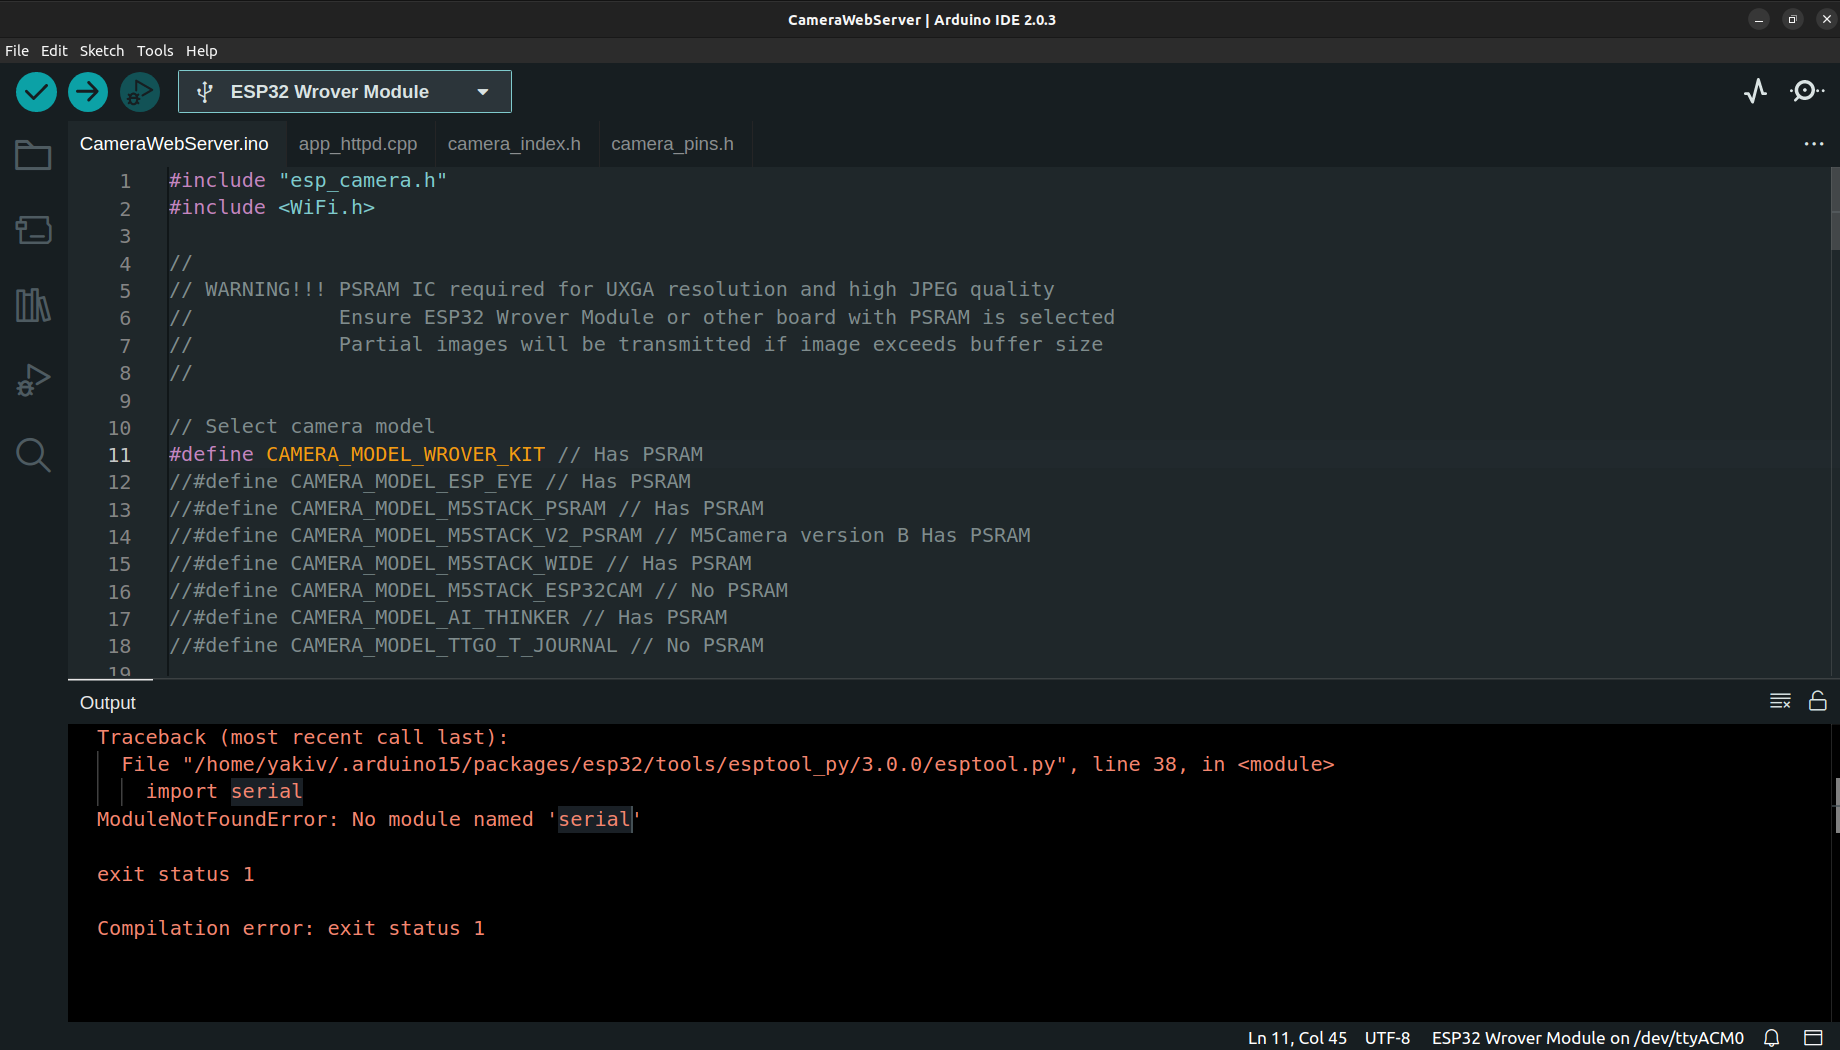
This means that Python’s serial module is not installed. To install it and fix the issue, do the following (from the CLI):
- Install the pip3 if you have Python 3 installed, or pip - for Python 2.
sudo apt install python3-pip
- Install the serial library
pip3 install pyserial
Tip. To check Python version you have installed run the command
python --versionin the CLI.
3. PermissionError: [Errno 13] Permission denied: ‘/dev/ttyACM0’

This issue occurs because we do not have permissions on the /dev/ttyACM0.
To set permissions please do the following:
# navigate to the rules.d directory
cd /etc/udev/rules.d

# create a file for the ne rule
sudo touch myrules.rules

# open the file
sudo vim myrules.rules

# add the line
KERNEL=="ttyACM0", MODE="0666"
Restart your computer.
4. Arduino IDE cannot connect to the ESP32-Cam during sketch upload.
If you see the line
Connecting........_____....._____....._____.....
which doesn’t stop and at the end you get the error
Could not connect
Simply click the RST (reset) button on the back side of ESP32-Cam the next time you upload the sketch.
5. “Brownout detector was triggered” error for ESP32-Cam in the Serial Monitor of Arduino IDE.
This happens when ESP32-Cam needs more power.
For example, you may get this error if you connect the Arduino with ESP32-Cam to the USB of the keyboard (if you are using a PC).
Just reconnect to another USB.
6. ESP32-Cam’s LED lights up all the time.
Most likely the issue is with the microSD card.
Try to use another one or with less volume.